
iso aperture shutter speed chart pdf
The Exposure Triangle is the core concept in photography, combining ISO, aperture, and shutter speed to control light capture. Mastering these elements ensures balanced exposures and desired effects, whether freezing motion or creating depth in images.
1.1 What is the Exposure Triangle?
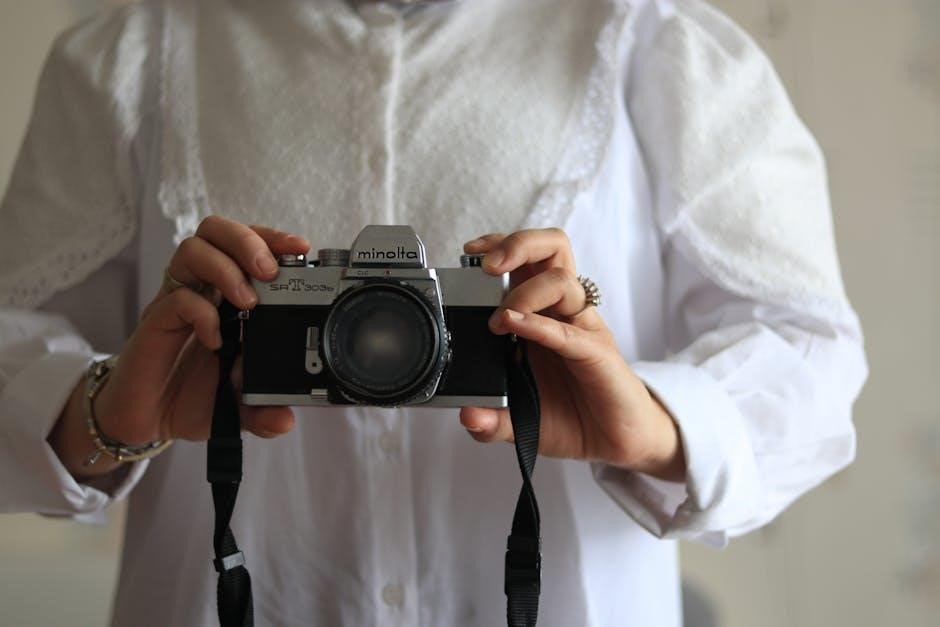
The Exposure Triangle is a fundamental photography concept that combines three key settings: ISO, aperture, and shutter speed. These elements work together to regulate the amount of light entering the camera, ensuring a properly exposed image. ISO controls the camera’s sensitivity to light, aperture adjusts the lens opening to let light in, and shutter speed determines how long the camera’s sensor is exposed to light. Balancing these three components is essential for achieving the desired aesthetic and technical quality in a photograph, whether freezing motion or creating artistic blur.
1.2 Importance of the Exposure Triangle
The Exposure Triangle is crucial for achieving optimal image quality by balancing ISO, aperture, and shutter speed. It offers precise control over light capture, enabling photographers to freeze motion or create artistic blur. Understanding this relationship ensures consistent results, enhances creativity, and simplifies adjustments in varying lighting conditions. By mastering the Exposure Triangle, photographers can make informed decisions to produce images with desired effects, whether in bright sunlight or low-light environments, ensuring every shot meets artistic and technical goals.

Understanding ISO
ISO refers to the camera sensor’s sensitivity to light, balancing exposure with aperture and shutter speed. Lower ISOs suit bright conditions, while higher ISOs enhance low-light performance, affecting image quality.
2.1 What is ISO?
ISO, or International Organization for Standardization, measures a camera’s light sensitivity. It’s a numerical value (e.g., ISO 100, ISO 6400) that determines how much light the sensor captures. Lower ISO values (like ISO 100) are best for bright lighting, as they minimize noise and ensure sharp images. Higher ISOs (like ISO 6400) are used in low-light conditions but can introduce noise, affecting image quality. ISO is a crucial element in the exposure triangle, alongside aperture and shutter speed, helping photographers achieve the perfect exposure in various lighting scenarios.
2.2 How ISO Affects Image Quality
ISO sensitivity directly impacts image quality by controlling light capture and introducing noise. Lower ISOs (e.g., ISO 100-400) minimize noise, ensuring sharp, clean images in bright conditions. Higher ISOs (e.g., ISO 6400-51200) amplify light in low conditions but introduce noise and artifacts, softening details and degrading colors. Moderate ISOs (e.g., ISO 800-3200) balance quality and usability. Balancing ISO with aperture and shutter speed is key to maintaining image fidelity while adapting to lighting scenarios. Modern cameras mitigate noise at high ISOs, but optimal quality remains best at lower settings.
2.3 Best Practices for Using ISO
For optimal image quality, use the lowest necessary ISO, typically ISO 100-400 in bright light. In low light, incrementally increase ISO while monitoring noise. Pair high ISOs with wide apertures or faster shutter speeds to minimize blur and noise. Use ISO 800-6400 for indoor or evening shots and ISO 12800+ cautiously for extreme low light. Enable noise reduction features and consider using a tripod to stabilize the camera, ensuring sharp images even at higher ISOs. Always review images to adjust settings for the best balance of light and quality.
Understanding Aperture
Aperture is the lens opening controlling light entry, measured in f-stops. Lower f-stops mean larger openings, more light, and shallower depth of field. A fundamental exposure triangle element with ISO and shutter speed.
3.1 What is Aperture?
Aperture is the adjustable opening in a camera lens, measured in f-stops (e.g., f/2.8, f/8). It determines how much light enters the camera and affects depth of field. A smaller f-stop value (e.g., f/2) means a larger aperture, allowing more light and a shallower focus, while a larger f-stop (e.g., f/16) results in less light and a deeper focus. Common f-stops include f/1.4, f/2, f/2.8, f/4, f/5.6, f/8, f/11, f/16, and f/22. Aperture adjustments are critical for achieving the desired visual effect in various lighting conditions.
3.2 How Aperture Affects Depth of Field
Aperture significantly impacts depth of field, which is the area in focus within an image. A larger aperture (smaller f-stop, e.g., f/2) creates a shallow depth of field, blurring the background and emphasizing the subject. Conversely, a smaller aperture (larger f-stop, e.g., f/16) results in a deeper depth of field, keeping more of the image sharp. This makes aperture a key tool for controlling focus in portraits, landscapes, and other compositions, allowing photographers to guide viewer attention and create visual storytelling through selective focus.
3.3 Best Practices for Using Aperture
Mastering aperture requires understanding its role in depth of field and light control. Start by using aperture priority mode to experiment with different f-stops. For portraits, use a wide aperture (like f/2.8) to blur backgrounds, while landscapes often benefit from a narrow aperture (f/11) to keep everything sharp. Adjust aperture based on lighting conditions and desired effects, referencing an ISO aperture shutter speed chart for guidance. Balancing aperture with ISO and shutter speed ensures optimal exposure and achieves the intended artistic impact in your photographs.
Understanding Shutter Speed
Shutter speed is the duration the camera’s shutter remains open, controlling motion capture and blur. It works with ISO and aperture to regulate light exposure and achieve desired effects.
4.1 What is Shutter Speed?
Shutter speed refers to the duration the camera’s shutter remains open, measured in seconds or fractions of a second. It regulates the amount of light entering the sensor and significantly influences the visual effects of an image. A faster shutter speed freezes motion, while a slower one creates blur, capturing movement and artistic effects. Shutter speed is a critical component of the exposure triangle, working in harmony with ISO and aperture to achieve optimal exposure. Understanding its role is essential for mastering various photographic techniques and styles in different lighting conditions and scenarios.
4.2 How Shutter Speed Affects Motion and Blur
Shutter speed plays a pivotal role in capturing motion and blur in photography. Faster shutter speeds, such as 1/1000th of a second, freeze motion, making them ideal for action and sports photography. Slower speeds, like 1 second, create intentional blur, conveying movement and artistic effects. A medium speed, around 1/125s, can subtly suggest motion while keeping details sharp. Balancing shutter speed with ISO and aperture ensures desired effects without overexposure, allowing photographers to control the narrative of their images effectively in various lighting conditions and creative scenarios.
4.3 Best Practices for Using Shutter Speed
Mastering shutter speed requires practice and understanding its impact on motion and blur. Use manual mode for precise control, and start with a medium speed like 1/125s for balanced results. For action photography, opt for speeds above 1/500s to freeze motion, while slower speeds (1s or more) create artistic blur. Always consider lighting conditions and adjust ISO and aperture accordingly. Referencing a shutter speed chart can guide optimal settings for various scenarios, helping photographers achieve their desired visual effects seamlessly.
The ISO Aperture Shutter Speed Chart
The ISO Aperture Shutter Speed Chart is a visual guide mapping interactions between ISO, aperture, and shutter speed. It simplifies achieving balanced exposures across lighting conditions.
5.1 What is an ISO Aperture Shutter Speed Chart?
An ISO Aperture Shutter Speed Chart is a visual tool that illustrates the relationships between ISO, aperture, and shutter speed. It provides a structured guide to understanding how these three elements interact to achieve proper exposure. By organizing these components into a chart, photographers can quickly reference and adjust settings for various lighting scenarios, ensuring balanced exposures; The chart typically includes a range of values for each element, allowing for effective decision-making in different photography situations.
5.2 How to Read the Chart
The ISO Aperture Shutter Speed Chart is structured with ISO, aperture, and shutter speed values organized in a grid or table format. Each axis typically represents one of the exposure variables, allowing photographers to cross-reference values easily. By locating a specific ISO and aperture combination, users can determine the corresponding shutter speed needed for proper exposure. The chart often includes full and third-stop increments, providing precise adjustments. Understanding how to interpret the chart enables photographers to quickly balance the exposure triangle and achieve desired results in various lighting conditions.
5.3 Applying the Chart in Different Lighting Conditions
The ISO Aperture Shutter Speed Chart is invaluable across various lighting scenarios. In bright sunlight, lower ISO and faster shutter speeds are ideal, while in low light, higher ISO and slower shutter speeds are necessary. For overcast skies, a balanced approach with medium ISO and moderate shutter speeds works best. The chart helps photographers quickly identify optimal settings, ensuring proper exposure and desired effects like motion blur or depth of field. By referencing the chart, photographers can adapt to changing conditions efficiently, achieving consistent results in diverse environments.
Practical Applications
The ISO aperture shutter speed chart helps photographers balance settings for optimal results in various scenarios, ensuring precise control over light and desired visual effects effortlessly.
6.1 Using the Chart for Portrait Photography
The chart simplifies portrait photography by guiding ISO, aperture, and shutter speed selections. A lower f-stop (like f/2.8) creates a shallow depth of field, blurring backgrounds and emphasizing subjects. Pairing this with a moderate ISO (100-400) ensures minimal noise. Shutter speed should be fast enough (1/200s or higher) to freeze subject movement, especially outdoors. Using the chart helps balance these settings for sharp, well-lit portraits with pleasing bokeh, ensuring professional results consistently.
6.2 Using the Chart for Landscape Photography
The chart is invaluable for landscape photography, helping you achieve sharp, detailed images. Use a narrow aperture (f/8-f/16) for deep depth of field, ensuring foreground and background are in focus. Lower ISO (100-400) minimizes noise, ideal for natural light. Shutter speed can be slower (1/30s-1s) to capture motion in water or clouds, adding dynamism. A tripod stabilizes the camera for long exposures. The chart guides these settings, balancing them to enhance textures and lighting, resulting in vibrant, professional-grade landscapes with minimal noise and maximum clarity.
6.3 Using the Chart for Action and Sports Photography
The chart is essential for capturing sharp, dynamic action shots. Use fast shutter speeds (1/1000s-1/4000s) to freeze motion and minimize blur, ideal for sports. A lower ISO (100-800) ensures minimal noise, while a wider aperture (f/2.8-f/4) allows more light and creates a shallow depth of field, separating subjects from backgrounds. For low-light conditions, slightly increase ISO or aperture. The chart helps balance these settings to capture high-speed action with clarity, ensuring crisp images of moving subjects. It guides quick adjustments, making it indispensable for dynamic photography environments.
Resources
Access downloadable PDF charts for ISO, aperture, and shutter speed. Explore further reading, online tutorials, and recommended camera tools to enhance your photography skills effectively.
7.1 Downloadable ISO Aperture Shutter Speed Chart PDF
A downloadable ISO, aperture, and shutter speed chart PDF is an essential tool for photographers. It provides a visual guide to understanding how these elements interact. The chart helps photographers balance exposure settings for optimal results. Available online, these PDFs often include cheat sheets and diagrams, making it easier to grasp the exposure triangle. Whether you’re a beginner or an advanced photographer, this resource is invaluable for quick reference. Many charts are customizable, catering to specific genres like portrait or landscape photography; Downloading a PDF chart ensures you always have a handy guide to achieve perfect exposures in any lighting condition. Use it alongside video tutorials for enhanced learning.
7.2 Further Reading and Online Resources
For deeper understanding, explore online resources like photography websites, blogs, and tutorials. Websites such as Digital Photography School and Photography Life offer detailed guides on mastering the exposure triangle. YouTube channels like Tony Northrup and Peter McKinnon provide video tutorials. Additionally, platforms like Skillshare and Udemy host courses on photography basics. These resources complement the downloadable chart, offering practical tips and real-world examples. They cater to both beginners and advanced photographers, ensuring comprehensive learning and application of ISO, aperture, and shutter speed principles. Expand your knowledge with these accessible and engaging tools.
7.3 Recommended Tools and Apps
Enhance your photography workflow with tools like Adobe Lightroom and Photoshop for editing, and apps such as F-Stop Timer and Shutter Speed Calculator for precise settings. Camera tethering software like Capture One aids in real-time adjustments. Mobile apps like PhotoPills and Exposure Calculator offer cheat sheets and simulations. Depth of Field Calculator apps help visualize field control. These tools simplify mastering the exposure triangle, ensuring optimal results in various lighting conditions. They are indispensable for both beginners and professionals aiming to refine their skills and achieve flawless exposures effortlessly.
Leave a Reply
You must be logged in to post a comment.